Let's start by looking in the main compartment.


 Here are folders ($1 for 2) that I put together for each student. Inside each folder there are clear plastic sleeves containing the maps we need for Cycle 2. Now I should have all the maps ready for the whole year. In the sleeves they are dry-erasable so we can practice and erase, and repeat.
Upon opening the lid you'll find a set of 8 dry erase crayons and 9 pencils all ready to go for any map drawing or games.
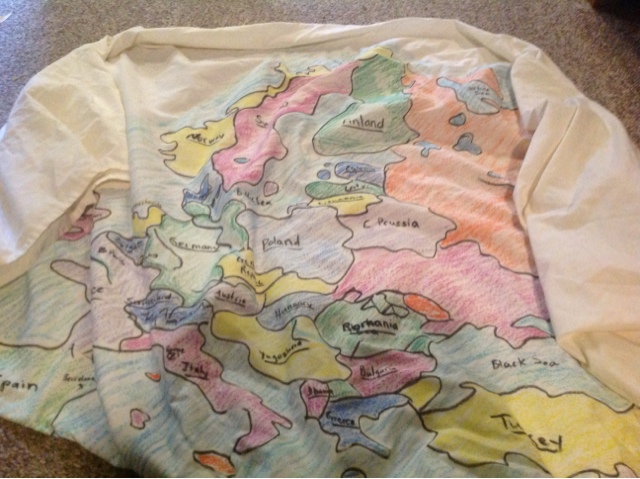
One great thing about thrift stores is finding old sheets. This one became a large CC map of Europe. They really would like us to use the same maps that appear in the CC Foundations guide. So, I asked my hubby to bring home an old faithful overhead projector. Took me a little while one evening to outline with a fabric marker, then color with good ol' crayons. I iron set the whole thing and there you have it.. It's about 5'x4', but rolls up nice and small to fit into my class on wheels.
Here are my quick reference guides to CC week by week. I found them on pinterest, printed them, and put them in a 4x6 GLITTER photo album (like $1 at Target). Yes, I had to have glitter. Just puts sparkles in my day if I need some. These don't replace my CC Foundations guide, they are just easy to hold and flip through for review games, and I couldn't afford the little cards CC has available.
As you can tell, since most of the items in this class on wheels are re-used or from dollar stores.
I had to throw this photo in of an out of place doll. I guess my 2 yr old thought she should go for a ride.
I have here all my timeline cards in a little tote. I laminated mine (with some free laminator sheets from my MIL) because I didn't have the money to put them in a binder with the clear sleeves. This took a while (my kids helped) but I wanted to protect these valuable cl-assets (sorry had to throw that in). Then I put them on rings and they fit in this little tote that I already had on hand (also $1 item). I am not sure that I will bring the whole set of cards each week. More than likely I'll just bring the set we are working on, but I like that they all stay in my rolling tote so my CC stuff is together and ready.
On the front of these folders I will have the student write their name. Each week if they bring in hand drawn/traced maps from home they will get a sticker on the front of their folder. Thought this was a neat way to let them see how much extra work they are doing. Also, there might be a bit of peer pressure if the other students can see someone hasn't done many. It might encourage them to do more. The stickers are on a roll all boxed up and also a $1 item. The stickers must help kids do extra work, because right on the box it says "motivational stickers".
I was tired of taking pictures of individual items, and thought you might be too. So, these guys were gracious enough to pose for a group photo. Re-stickable tabs to hold my place in my mini cycle 2 book, or foundations guide. Index cards a little more for my kids own presentations. Homemade game cubes. I hope the kids find these as fun as I thought they'd be. I will do a quick tutorial on making these in a later post.
So there you have the main compartment to my Classical Conversations Class on Wheels.
Hope it gives you some organizing ideas.
what website did you get the print offs for your flipbook
ReplyDeleteI would like to know where to find the printables for your flip book also. I can't seem to find it on Pinterest or C3.
ReplyDelete